
When learning how to homebrew mead the first step is understanding what exactly it is. Many people when they first start researching how to make mead have the misconception that it is a beer. It is actually closer to being a wine and is in fact often referred to as honey wine. Making mead is very similar to making wine and much easier and faster to home brew than beer.
Mead actually goes by a few names such as Mead Beer, Honey Wine, The Nectar of the gods and of course many consider it to be the drink Vikings called Grog; which although similar is not quite correct. Others consider it to be the first alcoholic beverage ever made and consumed by humans and there is evidence of it being brewed 8000 – 9000 years ago.
Although not easily available to buy commercially, mead has seen a resurgence in popularity among homebrewers in recent years. In this post I am going to provide you with a mead recipe for both a 1 gallon and 5 gallon batch and take you step by step through the process of how to brew up a batch for yourself. 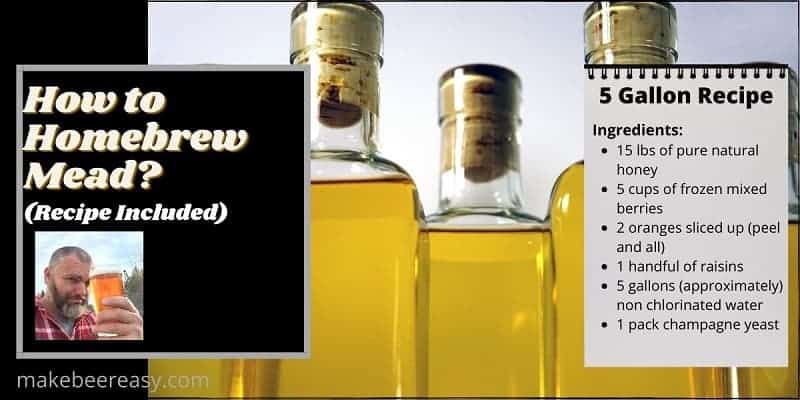
Equipment Needed to Make Mead
The equipment required to make a 5 gallon batch of mead is identical to your basic wine making kit or malt extract beer kit, to include:
- Fermenting bucket with a drilled hole in lid for airlock
- Glass carboy for secondary fermentation (if you want to secondary)
- Airlock with rubber bung (stopper)
- Siphon with hose/tubing (auto siphons are recommended)
- Plastic spoon
- Beer or wine bottles with caps or corks
- Bottle filler (spring-loaded)
- Cleaner and sanitizer
- Hydrometer
For the equipment needed to make a 1 gallon batch of mead the only real difference is you will need a 1 gallon glass carboy and a large funnel.
There is also not really any reason to use a fermenting bucket with this small of a batch, do all of your fermenting right in the 1 gallon carboy.
Ingredients Needed to Make Mead
You can make mead with honey as your only ingredient (besides water and yeast that is) or you can add fruit to it. The choice is yours. When you add fruit it is actually called melomel but most people still just call it mead. If you are using fruit, frozen fruit is the easiest and mixed berries work well.
You can also include orange slices (peels and all). 1 orange for a 1 gallon and 2-3 oranges for a 5 gallon will be more than enough and of course just like making beer you can perfect your recipe to your liking with each batch you make.
Also, it is recommended to use some raisins. Raisins will not provide any taste to the mead but are good nutrients for the yeast.
As for the honey itself, go for the best quality you can find. Locally sourced honey from beekeepers is your best option. If you can’t find locally sourced store bought will work fine just make sure that it is pure and natural, do not go for the cheapest brand you can find.
Lastly you will need yeast. Any wine yeast will work, many people like to use Champagne yeast. Nowadays you can even buy yeast that is labeled Mead Yeast.
Yeast does have a significant impact on the characteristics of any alcohol you are making so this will be an area you can experiment with. If you want a dry mead then get a higher attenuating yeast, if you want a sweater mead then get a lower attenuating yeast.
Mead Recipe – 5 Gallons
Mead Recipes in general are quite basic, the following is a very simple recipe you can use to brew up your first batch:
- 15 lbs of pure natural honey
- 5 cups of frozen mixed berries
- 2 oranges sliced up (peel and all)
- 1 handful of raisins
- 5 gallons (approximately) non chlorinated water
- 1 pack champagne yeast
Mead Recipe – 1 Gallon
Starting out you might want to make a 1 gallon batch. This way you can tweak the recipe until you get it just right before moving up to a 5 gallon batch.
Ingredients for 1 gallon batch are as follows:
- 2lbs of honey for a dry mead or 3lbs of honey for a sweeter mead
- 1 cup of frozen mixed berries
- ½ – 1 orange sliced up (peels and all)
- 10 -15 raisins
- ½ pack of champagne yeast
- 1 gallon (approximately) non-chlorinated water
Mead Making Instructions
1) Like anything else you are home brewing it is imperative that you sanitize all of your equipment. Anything that is going to come in contact with your mead needs to be cleaned and sanitized. This also includes the kettle. This is where someone who is used to making beer could go wrong. When making beer the boiling stage sanitizes the kettle, when making mead there is no boiling stage.
2) Once you are done sanitizing it is time to heat up your water. For a 5 gallon batch heat up 2 gallons of non-chlorinated water. For a 1 gallon batch heat up ½ gallon of non-chlorinated water. Do not allow the water to boil. 170 degrees Fahrenheit is perfect.
3) Remove the pot from the stove and start adding your honey. You do not want to do this on the stove as you can burn or scorch the bottom of your pot. Stir the honey until it is dissolved.
4) For a 5 gallon batch add 2 gallons of cold non-chlorinated water to your fermenter. Approximately ¼ of a gallon for a 1 gallon batch.
5) Now add the fruit to the fermenter.
6) Pour the warm honey mixture (liquid) into the fermenter. For the 1 gallon batch you will need to use your funnel. It is best if you let the warm mixture cool down first.
7) For the 5 gallon batch, top the fermenter up to the 5 gallon mark on the fermenter with cold non-chlorinated water and give it a stir to mix it. For the 1 gallon batch fill the glass carboy (fermenter) up leaving at least 2 inches of head space, put the cover or stopper on and give it a swirl to mix it.
8) Now it is time to add (pitch) your yeast. It is very important to make sure the “must” (the liquid) is not too hot or it will kill your yeast. I recommend you get it down to under 80 degrees Fahrenheit. Use a thermometer to be sure.
For a 1 gallon batch you only need to use ½ of a package of yeast. You can store the rest of the yeast in an airtight ziplock bag in the fridge to use for next time.
9) Give the fermenter a good stir/swirl, oxygen is good at this point.
10) It is now time to ferment your mead. Put your airlock in place, fill the airlock with water or a water and sanitizer mixture and then put your fermenter in a cool (not cold) dark room in your home. Room temperature is fine, I shoot for under 70 degrees Fahrenheit but prefer low 60’s.
Mead does better with age. So let it sit. I know this is the hard part but your patience will pay off in the end. A good rule of thumb is 6 weeks. You could take hydrometer readings if you like but even though we are making mead this site is still called Make Beer Easy so I just let it sit for 6 weeks and don’t bother taking readings and risking exposing it to oxygen. Make sure you keep your airlock filled with water/sanitizer.
How to Bottle Mead
Bottling is always the most tedious part of homebrewing. But clearly it must be done. When it comes to the bottles themselves you can use whatever you like. I am a beer brewer so I typically just use my swing top beer bottles. But you can use corked or screw on wine bottles, plastic bottles, capped bottles, etc.
I would recommend that you pick up another 5 gallon plastic bucket for bottling or if you transferred to the carboy you can use the original fermentation bucket. For a 1 gallon batch a big pot will work.
1) Sanitize everything, bucket, hose, siphon, bottle filler, bottles and caps/corks.
2) Transfer just the mead from your fermenter over to this bottling bucket. Leave the fruit and trub at the bottom of fermenter behind. You will use your sanitized siphon and hose to transfer the mead over. Bottling from a bottling bucket or pot will ensure that you leave most of the still living yeast behind.
3) If you want a sparkling mead you need to add a sugar to the mixture at this point. Adding a sugar source allows the fermentation to continue in the bottle. Fermentation creates gases and this is what you see when you open a bottle of champagne, the nice popping sound and little bubbles rising from the bottom.
For a sugar source you can use dextrose (corn sugar) or honey.
If using dextrose use ¾ cup of sugar for a 5 gallon batch and 2 ½ tbs (table spoons) for a 1 gallon batch.
If using honey use ⅔ of a cup for the 5 gallon batch and 2 tbs for a 1 gallon batch. Make sure to warm the honey up some before using it. Either leave your honey bottle out for a while on your counter or soak the bottle in warm water.
Still the mixture very gently so as not to allow oxygen in. When sugar and honey is dissolved you can start bottling.
4) It is best to put the bottling bucket filled with mead on a counter and your bottles on the floor sitting on a towel. Use your siphon and bottle filler to transfer the mead over to each bottle. Place the bottle filler at the bottom of the bottle and allow the mead to fill the bottles all the way up to the top. When you remove the bottle filler the level will drop down to a perfect level. For sparkling mead do not fill it quite as high, give it just a little bit more space.
5) Put the cap or cork on the bottle and put your bottles away in a cool dark place. For a “still” mead (non carbonated) you can drink them at any time. For a sparkling mead you need to let them carbonate for at least 7 – 14 days.
If you are using wine bottles with corks you can store the mead for months and even years. If you are using screw-on caps they will not be as air tight and I would recommend drinking the mead within 2 – 3 months or you risk having it turn into vinegar.
There you have it my friend, learning how to homebrew mead is actually very simple especially if you have any experience at all in homebrewing. I do recommend starting with a 1 gallon batch and going from there.
If you have any questions on how to make mead or any home brewing questions at all feel free to put them in the comments and I will do my best to help ya out.
Now go get your brew awnnn…
Cheers Big Robb is Out!
