Many extract homebrewers become intimidated by the thoughts of transitioning to all-grain brewing. They believe it will be overly expensive and complicated and as a result, are hesitant to make the move. However, thanks to the Brew In A Bag method these concerns can be put to rest. Brew In A Bag or sometimes referred to as BIAB is a simple and cost-effective brewing method to allow extract and partial mash brewers to get started in all-grain brewing without having to spend a fortune on new brewing equipment.
In this post, we will explain what the brew in a bag method is, what equipment you require, and provide you with step-by-step instructions on how to make your first batch of beer…
What is Brew in a Bag?
Save
At its core, it is a straightforward and simple method of making beer that as you will see surprisingly has a lot in common with making a cup of tea.
It is simpler than other all-grain brewing methods as it uses one vessel or kettle instead of two or three like other methods do; it also does not implement more advanced brewing techniques such as sparging which is basically rinsing your grains, although you can still do a simpler version of rinsing if you so desire but it is not required.
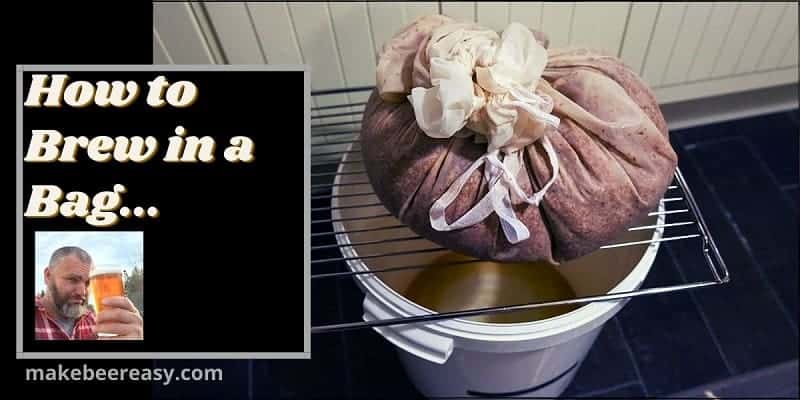
The best way to explain the basics of this brewing method is to go back to our tea example, with BIAB you use a grain bag or a brew bag that you fill with the grains and soak the bag in the hot water just like the teabag. This soaking is called mashing. The concept is pretty much identical however the end result is delicious homebrew.
When this soaking of the grains or mash is over you remove the bag and grains and you boil the remaining liquid (wort) adding hops throughout the boil. You then ferment the beer as you would using any other method.
The Brew in a Bag Method
Further in this post, we are going to get into step by step brewing instructions, however, to give you an overview of the process, the following are the 5 basic steps that are involved:
1) Mashing, which involves adding the grains to the brew bag and soaking them in warm water in the brew kettle.
2) Remove the bag and grains from the kettle after the mash is over, allowing all of the liquid to drain from the grains into the brew kettle.
3) Start the boil and add the hops to the wort as per the timings outlined in the BIAB recipe.
4) After the boil has ended cool the wort down to the proper temperature to be able to add (pitch) the yeast.
5) Transfer the cooled liquid (wort) to the sterilized fermenter and add (pitch) the yeast.
The following is the basic equipment needed for a brew in a bag system…
Brew in a Bag Equipment
One of the highlights of this method of making beer is the minimal amount of equipment you require. If you have been making beer using extract kits or partial mashing you will already have most of the basic equipment you require. As you will see compared to 2 & 3 vessel systems the additional equipment required is minimal…
A Brew Bag
Considering this method is named after the bag itself, it is clearly an important piece of equipment to the process.
Although you could make your own brew bag and there are plenty of DIY projects online to help you do so, I would not recommend that you waste your time doing so.
There really is no need to reinvent the wheel as there are lots of companies out there that specialize in making these bags. They are not expensive, are reusable, are very durable, and they work very well.
Make sure you get the right size bag to fit your kettle as too big of a bag will result in the bottom of it touching the bottom of the kettle which can burn or scorch your grains and the bag itself. Some of these companies will even custom make you a bag to fit the exact dimensions of your kettle.
A Brew Kettle
This is another area where there are significant cost savings versus the other brewing methods available to you; instead of having to purchase two or three kettles you only need the one.
For a 5 – 6 gallon batch of beer, I would recommend a kettle that is capable of holding 15 gallons. A 10-gallon kettle will work but 15 gallons will be better as it gives you more space if you are brewing bigger beers with more grains, plus you will have less worry about boilovers happening. The difference in price is not much so it is worth the additional investment.
A Propane Burner & Tank
This type of system is heated using propane. So you will need to pick up a burner and a propane tank. A turkey burner works great and is easily found at most hardware stores.
One thing to note is these systems require a space that has lots of ventilation just like your BBQ. As a result, it is recommended that you brew outside.
Thermometer and a Hydrometer
You will need a thermometer in order to make sure you reach and maintain your mash temperature.
A hydrometer is used to help you measure your original gravity and final gravity which allows you to make sure you have hit your recipes numbers. As well as confirming when fermentation has completed and allowing you to determine the ABV (alcohol by volume) of your beer.
A Mash Paddle
You may already have a plastic stirring spoon, however, you will want to get yourself a larger metal or wood mash paddle. When you are making a beer with this method it is important to stir your mash a few times in order to increase your efficiency.
Brew in a Bag Recipes
A standard all-grain recipe will work fine.
Some people will tell you that you will have to increase the grain bill to hit your efficiency numbers in order to compensate for not sparging. You can definitely do so if you like however I have never found that this is required and that a standard all-grain beer recipe sufficed. If you have concerns over not hitting your gravities you can try crushing your grains a little finer and also performing a rinse or dunk sparge to get all the sugars rinsed off the grains and into your boil.
Alright, you’ve got your equipment, recipe, and ingredients, it’s time to brew. The following at the steps to take when brewing in a bag. As you will see they are very simple and straightforward…
Clean & Sanitize Your Equipment
It is crucial that your equipment is clean and sanitized. Beer is very susceptible to bacteria and you can ruin a batch if you are not careful.
Either buy your grains pre-crushed or crush your own. Ordering your grains pre-crushed is highly recommended, it saves you the extra equipment cost of buying a mill and most homebrew shops will crush your grains for an extra dollar or two. In my experience, the additional cost is well worth the extra time and effort it takes to mill your own grains.
Properly milled grains are important in order to get the proper conversion of the grain’s starches to sugars.
Calculate How Much Water You Need
If you are used to using the typical rule of thumb of 1 – 2 quarts of water per lb of grain you will find this method a bit different.
To calculate the amount of strike water you need you will calculate your pre-boil volume which is simply done by taking the boil time x boil of rate + final batch volume.
Boil time is how long the recipe tells you to boil for; typically 1 hour.
Boil rate is how much liquid your system boils off in an hour.
To determine what this rate is you will need to test this on your system. Simply boil some water for an hour and see how much boiled off.
If you started with 6 gallons and an hour later 5 gallons is left in the kettle your boil-off rate is 1 gallon per hour. So for this example use a boil-off rate of 1 gallon per hour.
Your final batch volume is 5 gallons. This is your finished product.
So your pre-boil volume would be 1 x 1 + 5 = 6 gallons.
This means when you have finished your mash and removed the grains you will want 6 gallons left in the kettle before you start your boil to end up with 5 gallons of finished product.
Now that we know the pre-boil amount we need to figure out our strike water amount, this is the amount of water you start with when you mash.
To start you need to know the grain absorption rate, brewers use a rule of thumb of .125 gallons per lb of grain.
You need to know the total weight of grains your recipe is calling for. Let’s say this recipe is calling for 12 lbs of grains.
And as per the calculations we just did we know our pre-boil amount of 6 gallons.
The calculation for Strike Water is: Absorption Rate x Grain Weight + Pre-Boil Amount
In this case:
.125 x 12 + 6 = 7.5 gallons of strike water is required.
This may seem complicated but it will become easier for you the more brew days you have under your belt. Go back through what we have done here a couple of times and it will become clear. If you need more help figuring this out feel free to drop a comment in the comment section below and I will help you out.
Calculate Your Strike Water Temperature
Your recipe is going to provide you with a target mash temperature. This is the temperature you will want to keep the water at while you are mashing your grains for the 60 – 90 minutes.
Some people make the mistake of thinking that when they should simply heat the water up to the mash temperature.
The problem with doing that is the grains absorb some of the heat which reduces the water temperature as does the stirring that you do while adding the grains.
As a result, you need to heat your strike water up to a temperature that is higher than the mash temperature that you want to end up with.
You will get a good feel for this as you start brewing…
Typically heating the strike water about 8 – 10 degrees Fahrenheit higher than the mash temperature is a good rule of thumb.
Example: Let’s say your recipe calls for a mash temp of 150 degrees Fahrenheit. You would heat the water up to 160 degrees using the rule of thumb of 10 degrees higher. When you add the grains and stir them in the temp should drop back down to the mash temp of 150 degrees.
Mashing
Mashing with the brew in a bag method is straightforward and is done in 6 easy steps:
1) Add the strike water. Heat it up to the strike temperature you calculated.
2) Put the brew bag into the kettle, secure it to the side of the kettle with clips or bungee cords.
3) Dough in which means adding the grains to the bag within the kettle. Add them slowly and stir the mixture as you add them.
4) Using your thermometer confirm you are at your mash temperature. Adjust the temperature if you need to. Do not panic over this too much, if you are within a few degrees either way of your mash temperature you are great.
If need be you can adjust the temperature by either adding cold water to cool it down, hot water to warm it up, or turning the burner back on to heat it up. If you turn the burner back on be careful not to scorch the bag.
5) Turn off the heat and now insulate your kettle as best you can. Wrap blankets or sleeping bags around it. This helps to keep the heat from dropping.
When insulating the kettle it’s always good to remove it away from the heat source so as to not cause a fire.
6) Leave the kettle alone for the time called for in the recipe.
Remove the Brew Bag
When your mash is over you will need to take the brew bag out of the kettle. You may need help lifting this as it becomes very heavy due to the grains absorbing some of the water, either get a friend to help you or use a hoist.
Now let the liquid drain out of the bag into the kettle. If you have a hoist you can let the bag hang over the kettle while it drains, alternatively, you can rig up a strainer-like system that you set the bag on overtop of the kettle. If you have gloves you can squeeze the bag to speed up the process.
Boiling Your Wort
Once all of the wort has stopped draining into the kettle it is time to turn your burner on again and bring the kettle to a rolling boil. When making all-grain beer one of the things you have to look out for is what is referred to as a boilover. As the wort is reaching boiling temperatures it will start to foam up and can “boil over” the top of the kettle making a big mess. Watch for this as it can happen quickly.
A few ways of preventing a boilover are:
Stir your wort as it is getting close to boil
Have a spray bottle with cold water that you spray on top of the foam as it is forming
You can use a product called fermcap that you put a few drops in as the boil starts and it will prevent the foaming.
Your recipe will tell you how long you are to boil the wort for, and it will also tell you when and the number of hops to add during the boil.
When adding hops to the boil I recommend that you use a little grain bag or muslin bag. Put the hops into the bag and place the bag into the kettle. This will make for a cleaner and clearer beer.
Cooling Your Beer
When the boil is over it is now time to cool or chill the wort.
This is a crucial step because if you add the yeast when the wort is too hot it will kill the yeast and you won’t end up with beer.
You can check out this training on how to cool your wort and also see the wort chillers we recommend you use: How to Cool Wort – Top 5 Methods
Fermenting Your Wort
If you have made extract or partial mash homebrew before this step is identical to what you did with them. You will simply transfer your cooled wort over to your sanitized fermenter and add (pitch) the yeast on top of it.
Once you have added the yeast take a sterilized spoon and give it a good stir. Put the cover on and put the fermenter away to ferment.
You can but you should not need to. If you are finding that you are not hitting your efficiency then sparging might help you. There are two simple ways to sparge with BIAB
Dunk Sparge – this is where you simply remove the grain bag and place it into a separate pot with 170 – 190 degrees F water and let it sit there for approximately 10 minutes. The amount of water you would use will depend on how much water you need to bring the liquid in your kettle up to your pre-boil level.
Rinse Sparge – With this method you will be pouring water slowly over the top of the grain bag as it is hanging over the kettle. The same principles as the dunk sparge apply here. Use 170 – 190 degrees F water and only use enough water to bring the liquid in the kettle up to your pre-boil level.
How long does brew in a bag take?
Brew day will take approximately 5- 6 hours. This method takes slightly less time than other all-grain methods because there are fewer parts involved and you are only cleaning 1 kettle.
Does BIAB make good beer?
I have brewed on 3 vessel systems and I have lots of experience on 2 vessel systems as that is what we used at our brewpub and in my experience, I have found that this method makes as good or better beer than any of the other methods.
There you have it my friend you now know how to brew in a bag. Once you have brewed a few batches of beer using this method you may want to move to using an all-one electrical brewing system, which is basically an electric BIAB system, which allows you to brew inside, you can learn about how these systems work here: Electric BIAB – Everything You Need to Know
P.S. Be sure to check out my offer to get access to the recipes for my top 5 beers from my brewpub. Sign up is on the side of the blog or at the bottom if you are on your smart device. Enjoy!