Although not always the case, most brewers typically prefer making a clear beer over a cloudy beer and nobody likes finding yeast or trub floaties in their glass. For years using gelatin to clear beer has been a homebrewing strategy implemented by many to accomplish this.
For myself, I find that a clear beer not only looks better but gives the impression that it is a better brew and that you did a better job in the brewing process. Now I realize there is a huge movement for cloudy and hazy beers these days and that is all well and good. If you are brewing a NEIPA then you obviously would not want to bother fining your beer with gelatin or any other fining agents.
But if you are aiming for that crystal clear beer that you can see through when you pour it into your glass then learning about fining beer with gelatin is something you may want to consider.
There are numerous things you can do to including adding other fining agents to make sure you end up with a clear beer. My top 3 are using whirlfloc during the last 10 – 20 minutes of the boil, cold crashing the beer before bottling or kegging it, followed very closely by adding gelatin after cold crashing.
You can check out the following post if you want to learn more about how to clear your homebrew. I go over 7 proven methods: How to Clear Home Brew Beer
What Exactly is Gelatin?
If you are vegan or have a queasy stomach gelatin will probably not be for you. 
This is because gelatin is actually a derivative of animal collagen. It is made from the actual protein that is taken from the bones, cartilage, skin, and tendons of animals; it is processed and turned into the gel-like form you buy.
That might at first turn you off but I can virtually guarantee you have eaten it countless times in your life. It is used throughout the food industry. It might surprise you to find out where else it is used. It is an ingredient of most candies and many desserts; even some makeup is manufactured with it. Most meats in their natural form are also going to have it present.
Now if the thought of consuming gelatin in your homebrew bothers you let me put your mind at ease. Any beer you clear with gelatin will not actually have much if any left in it by the time you pour it into your glass (you most definitely will not be able to detect it). This is because like other fining agents and methods it settles out on the bottom of the container, whether that is the fermenter or keg. Here is a post with more details on what gelatin is.
When Should You Add Gelatin to Beer?
You can add it into the fermenter or you can put it directly into the keg, either way, will work just fine. I’ve done both methods and they both work equally well.
However, 9 times out of 10 I will put it into the fermenter instead of the keg.
There are a couple of reasons for this:
- The first is that your home brew needs to be cold for the gelatin to do its magic. So what I like to do is in the middle of cold crashing add the gelatin and then put it back into the fridge for another 24 hours or so.
- The second reason is that if you put it into the fermenter and it does not clear it up as well as you like you can always add it to the keg also and let it go to work for a second time. Whereas if you just add it to the keg from the get-go you will not be able to do this second fining.
The big thing to remember about when to add gelatin finings is to keep in mind that your beer has to be cold. Fridge temperatures. Do not add it to the fermenter and then cold crash as that will not work as well because it will take some time for the brew to get to the correct cold temperature. Either add it after you are done cold crashing or add it halfway through cold crashing (this is the best method).
How Does Gelatin Clear Your Brew?
After fermentation is completed the yeast that is still floating around or is in suspension begins to drop to the bottom of the fermenter or flocculate. Obviously,

This is why people cold crash their homebrew.
By lowering the temperature of the brew over a period of days it speeds up the process of the yeast dropping out. Ideally, you should let the cold crashing process happen for a number of days.
However, I am at times guilty of not letting it sit for as long as it should. I typically only give it about 2 days, where more time would be ideal. 5 days would be excellent. However, this is where gelatin helps us impatient home brewers out by speeding up the clarifying process significantly.
It speeds up the process by basically grabbing a hold of the particles floating around in your beer and helps them to drop to the bottom of the keg or fermenter much faster.
Which again results in a much more clear and clean-looking end product, i.e. the beer you pour into your mug.
Now one thing to prepare yourself for and know in advance is that if you decide to add the gelatin directly into your keg that means that you are going to have all of the particles drop to the bottom of the keg, and as you know the liquid pick up line is at the bottom of most kegs. Which means the first couple of glasses of beer that you pour will probably be quite cloudy and hazy-looking. But after the first couple of glasses, you should start to see some very clear beer being poured.
Video Tutorial
How to Use Gelatin to Clear Your Beer
After you have cold crashed your beer for about 2 days (remember longer is better) you are ready to add the gelatin.
There are a few ways to go about this:
Some will tell you to take 1 cup of water and boil it and then let it cool down on its own to about 150 degrees F. Put a piece of tin foil over it while you wait for it to cool, as this will help prevent bacteria from getting in.
Others will tell you to take 1 cup of water and heat it up in increments in the microwave until you get to the 150 degrees F.
Personally, myself I simply use hot tap water and don’t worry about reaching 150 degrees F and it has worked just fine for me. This is Make Beer Easy after all. Always keeping it simple and easy.
So the choice is yours, try them all and see which works better for you.
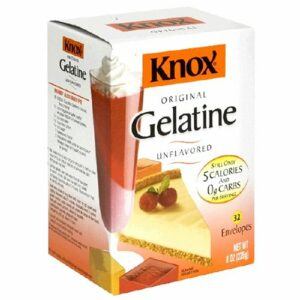
Once you have your water ready to go, get your gelatin fining agent out. Store bought, unflavored, or unscented, standard run-of-the-mill cooking gelatin is what you are looking for. It is called Knox around here and you buy it in the grocery store.

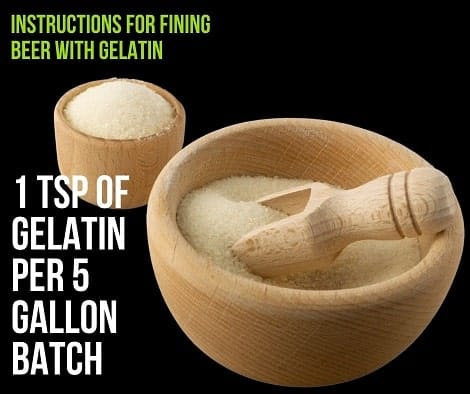
Take 1 tsp per 5 gallons of beer and dissolve it in a cup of water. Make sure your cup and spoon are sanitized.
Now pour the mixture into either your fermenter or keg.
Now cold crash again. You will want to give it at least 2 days to work its magic.
If you are kegging make sure to seal the keg with C02, but do not start carbonating it yet.
If you are adding the gelatin to the fermenter then make sure you put the airlock or some sort of cover back on.
To Wrap it Up
Using this method is no brainer for me as I am such a huge fan of clear beer and it works so well, so I do recommend that you give it a try.
If you want to order the brand I use you can get some by Clicking Here
But again if you do not like the idea of using it there are other methods to get your homebrew cleared up. And the following link will take you to a post that goes into detail about my other favorite methods to clear home brew: 7 Proven methods to clear homebrew
Check out the following video for more step by step instructions on fining beer with gelatin:
If you have any questions at all then be sure to drop them in the comment section below and I will do my best to help you out.
Cheers, Big Robb is Out.

