
If you are asking the question… What do I need to brew beer? You have come to the right place.
I created this site Make Beer Easy to help people like yourself weed through all of the clutter on the internet and figure out how to brew their own beer and do so easily.
Just like anything in life some people try to complicate the heck out of making beer. When in fact people have been doing
Yes there are a few steps involved… and yes you will want to know what you are doing… but after reading this article you will be well on your way to being able to brew some tasty beers!
First Things First
Since you are asking what do I need to brew a beer it is obvious that you have never done so.
As such I recommend you start at the very beginning…
What I mean by this is there are different stages or levels of difficulty when it comes to brewing.
There are 3 main ways that people make beer and each level is a bit more challenging than the previous one.
However, the cool thing is that they all feed of the one before it. Meaning if you are at level 2, what you have learned at level 1 you will be using. And not only will you be using what you have learned, but you will also be using most of the same equipment, plus a bit more.
What this means is that by starting at the first stage or level, you will not only be getting the basic required understanding of brewing… but you will only have to buy the first bit of equipment… and than when you move to the next level you will only need to buy a few more pieces of equipment and so on…
You can see where this is a major time and money saver for you… you learn a little but as you go and you spend a little bit as you go.
3 Stages of Brewing
OK so let’s quickly look at the 3 stages of brewing…
=> Stage 1: Malt Extract Kits… This is where I recommend you start. This is the least expensive way to get started and the simplest. Stage 1 allows you to learn the basics of brewing to include, fermenting, cold crashing, conditioning, carbonating and bottling to name a few.
At this stage you will pick up a beer kit that basically looks like a can of apple or orange juice. However on the inside it has a syrupy mixture called Malt Extract that looks like molasses… and under the can they give you a packet of yeast.
The malt extract is pre-hopped meaning you do not need to add any hops as it has already been done for you. With this kit you pretty much just add the contents of the can to water, stir it up and you are off to the races.
=> Stage 2: Partial Mash Brewing… In this stage you are going to basically make the beer kit from stage 1 yourself. You are going to use malt extract but it will not be pre-hopped. You will be adding the hops during the brewing process.
You are also going to get some experience with using grains. The grains you will be using are called specialty grains and they add flavor, body, color, mouth feel and head retention to the beer.
This stage is a great introduction to all grain brewing which is stage 3.
=> Stage 3: All Grain Brewing… this is where the big boys play. All grain home brewing is the exact same as what the micro-breweries do except on a smaller scale.
You make all of the beer from scratch, no more malt extract.
You will be using:
- base grains
- specialty grains
- hops
- and yeast.
You will also be performing water chemistry and wort clarification.
This stage makes the best beer, but it takes some time to master and it is why I always recommend people start at stage 1 and work their way up…
If you have brewed some beer from stage 1 already and want to jump ahead to learn more about how to brewin beer from stage 2 and stage 3 and the equipment you need then you should read the following posts:
To learn ALL about Stage 2 & the equipment you need go here => 10 Easy to Follow Partial Mash Brewing Instructions
To learn ALL about Stage 3 & the equipment you need go here => All Grain Brewing Instructions – Make Great Beer Everytime
So for the rest of this article we are going to focus on what you need to brew a stage 1 beer…
Let’s start with the equipment…
Beer Brewing Equipment
So the equipment you require is very basic at this stage… however as I indicated you are going to be able to use what you purchase here later on in stage 2 and 3.
You are going to need:
=> A Fermenter… a fermenter is the container you put the unfermented beer (wort) into after you are done brewing it. Brewing the beer at this stage is just a matter of mixing the contents (explained in detail further in post).
The fermenter must be air tight. Oxygen is bad for your beer at this stage, it can cause nasty off flavors. Typically, resulting in the brew tasting like apple juice… not a good thing!
The fermenter should be able to hold at least 24 liters, and ideally closer to 30 liters. A batch will be anywhere from 19 – 23 liters (5 – 6 gallons), so you need head space in the fermenter so you do not get spill overs and have a big mess to clean up.
Fermenters for beer should be Opaque, meaning you can’t see through them clearly. Some people will use the glass carboys that are for making wine. I do not recommend these as they are clear glass. Beer can become skunky tasting if light gets through the fermenter during fermentation. If you use a glass carboy wrap a blanket around it or put it in a dark place during fermentation.
=> A Mash Paddle… a mash paddle is a fancy brewing name for a big stir stick! At this stage you do not require a big wooden or stainless steel one like you see the big breweries use. A large plastic spoon will work just fine.
=> Bottles… You will need forty 500ml bottles with covers. Of course, you could go the old fashion route of using beer bottles from the store, I think they hold about 355ml. You would than need to buy yourself a bottle capper and go about
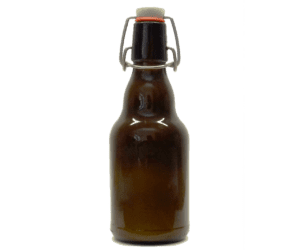
What I recommend is picking up the plastic homebrew bottles. They are typically 500ml. They have twist on caps and are reusable. I use these in conjunction with glass swing top bottles. You can either buy the glass bottles from home brew stores or go to the liquor store and buy beer that some companies bottle their beer in.
Alternatively you can get into kegging your beer. It’s a lot easier for sure, but costs a bit more to get set up and requires you learn how to do it. If you are interested in kegging here is a post on how to do so: Kegging Beer
=> Hydrometer… this measures the original gravity and final gravity to determine the alcohol content.
When you are done your brew day you will check the gravity. This is your original gravity. Your recipe will tell you what it should be. By checking your original gravity you will be able to determine how you did. If you missed your gravity you can make adjustments for the next brew day.
Once fermentation is finished it will have reached what is referred to as the final gravity. This is the point at which the gravity will not go any lower and your beer has finished brewing.
=> A Thermometer… temperature control is paramount to successful brewing.
You need to make sure the wort (unfermented beer) is at the correct temperature range before adding the yeast (pitching). The ideal range for most yeasts is 60 – 70 degrees Fahrenheit. If you pitch the yeast when the wort is too hot you will kill the yeast… if you pitch the yeast when the wort is too cold it will put the yeast to sleep (it will wake back up once the wort comes into the correct temperature range).
And while the brew is fermenting you want to control the temperature. If you ferment at too high of a temperature the yeast will produce off flavors. And if you ferment at too low of a temperature the yeast will get lazy and will not do all of the work it is supposed to and as a result will not eat all of the sugars that it should, which results in a beer with a lower ABV (alcohol level) and also will be much sweeter than you wanted.
So where do you get all of this equipment??
Read on…
Where to Buy Your Beer Making Equipment
There are two options I always recommend for people just starting out brewing.
Two companies Mr. Beer and Coopers Homebrewing have come up with a Beer Kit that has EVERYTHING you need to
They both come with:
- Fermenters
- Hydrometers
- Thermometers
- Bottles
- Bottle Caps
- Mash Paddle (coopers does, Mr. Beer does not as you do not need one for their system)
AND on top of all of the equipment both of these kits come with ALL of the ingredients to make your first batch of beer.
So yup you get all of the equipment and the ingredients in their kits. It’s a great way to get started brewing beer.
So Which Beer Kit Should You Chose?
The choice is entirely up to you… I have both…
Mr. Beer makes 2-3 gallons of beer… where the Coopers DIY Kit makes 5 – 6 gallons.
So how much brew do you want on hand? If you want 2-3 gallons grab the Mr. Beer… if You want 5 – 6 gallons grab the Coopers Homebrew Kit
Here are a couple of posts to give you more information on both of these kits:
It’s Time to Make Beer
So there you have it… now you have the answer to your question what do I need to brew a beer…
As for making the beer itself here is a link with step by step instructions:
Again what was just shared is the basics for stage 1 brewing… if you want to get going at a higher level here are a few other posts that you may find helpful:
All Grain Brewing Instructions
And if I can help you out, drop a comment below in the comment section and I will be sure to answer.
Cheers!
I tried brewing my own beer a while ago and failed big time. Just didn’t do enough research I think.
This article you have written definitely lays it out clear and simple the right steps to take and what equipment you need to get the job done right.
My uncle has brewed beer for 10+ years and makes a quality home brewed beer consistently.
The biggest tip he past onto me was to make sure to get into the habit of sanitizing everything that will come in contact with your wort or beer after the boil.
-All the best
-Will
You got it Will… Sanitizing and cleaning is the key. A brew day can go wrong quickly if you don’t sanitize thoroughly. Here is a link on how to sanitize beer making equipment, explains how to do it and the best sanitizer to use also. Cheers
You have given me some additional confidence to start brewing my own beer. At a minimum, it sounds like a fun project. You did a great job of explaining the supplies that I need to plan on purchasing. Air is bad. Don’t want beer to taste like apple juice.
Eventually I want to make my own dark beers. I like those flavors better. Thanks again.
Your Welcome! Cheers
I really enjoyed reading your article. I never gave much thought to brewing my own beer but you have peaked my interest in the subject. Doing it myself would certainly give the beer some originality and I’m sure it brings a sense of accomplishment when everyone loves your finished product.
You mentioned Mr Beer Brewing kit and Coopers Homebrew kit. In your opinion, does one offer a better tasting end result over the other? Which kit is the best value for the money do you think? Thanks for your help!
Hi… both kits create as good of beer as the other. They are both actually owed by Coopers. It really comes down to the amount of beer you want to brew at a time. Mr Beer produces around 2-3 gallons where Coopers creates about 5-6. Here is a link to a review on each of them to help you decide:
Coopers Homebrew Kit Review
Mr Beer Brewing Instructions
Years ago, when we were in our 20’s, our dear friend Jim was a beer-making master. He would have these wonderful parties at his house, and he would serve us his home-brewed beer in bottles. When I say it was delicious (and STRONG), I mean it. It didn’t take too many to really feel it, and the taste was like nothing we had ever had before. I absolutely loved it.
Jim has passed away, and we are having a memorial party for him this summer. We thought what would be a more fitting tribute than to serve some home-brew ourselves to our many friends who miss him.
I am so excited to find that it really doesn’t look as complicated as I had thought. This actually looks like an easy process. Thank you so much for compiling this information. You saved me a lot of hard work!
Your welcome Babsie, happy to help! And Cheers to your old friend Jim.