
One of the main reasons that Kolsch is such a popular beer among homebrewers is the fact that it tastes and looks like a lager but it is actually an ale. Which means unlike a lager you won’t incur the additional equipment costs for refrigeration to homebrew a Kolsch; and it takes a fraction of the time to brew.
If you have brewed ales before than learning how to homebrew a Kolsch is a simple process. The process is the same as any other ale you have ever made.
It is a refresshingly clean beer that will quench your thirst and give your pallet a break from the complex and hoppy beers most homebrewers are tending to make these days.
Short History Lesson
The history behind this beer is an interesting one. Even though the style per se has been brewed for hundreds of years it was not until the early 20th century that it was given the name Kolsch.
Kolsch is “officially” brewed exclusively in the city of Cologne, Germany. In fact the name Kolsch in local dialect actually means “of Cologne”. Beers in Germany are known for the area in which they are brewed. 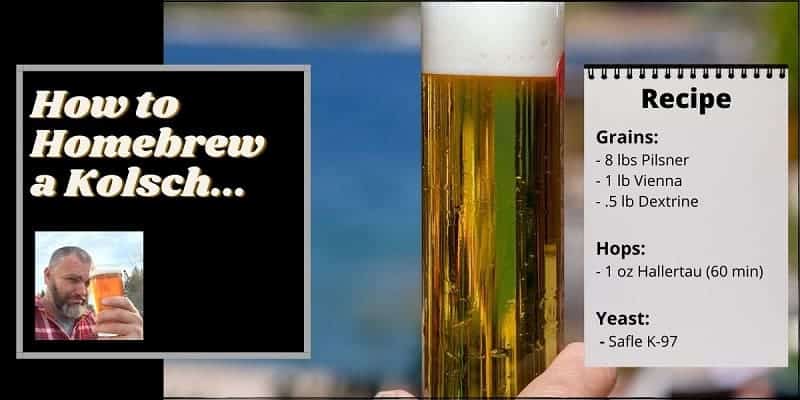
Kolsch became a very popular beer in Germany and as a result many other parts of the country wanted to cash in it’s popularity. To stop this from happening back in the 1980’s the German government and the breweries in Cologne came up with what is called the Kolsch convention.
The convention is basically a set of brewing rules which sets the guidelines for this style of beer ; it can only be “officially” called a Kolsch if it meets all of the criteria in the convention, one of which is that it must be brewed in Cologne.
The other rules in the convernation are that it is top fermented (which means it is an ale), it is filtered, pale in color and hop accented. Basically it is a very light pale ale that must be brewed in Cologne to “officially” recognized as a Kolsch.
So in this post I am going to show you how to homebrew a beer that is identical to a Kolsch in every way. However since you most likely have no plans of packing your suitcase and heading to Cologne Germany to brew it; “officially” you are not supposed to call it a Kolsch. Having said that I feel quite positive the members of the convention will not be hunting you down if you decided to do so, so call it whatever you like, this is homebrewing after all.
How it Should Look (Appearance)
When it comes to how it should look the first think you absolutely must do is serve this homebrew in a stange. What is a stange you say? It is a tall, lightweight and narrow German beer glass that has been traditionally used to serve Kolsch. It is a easy drinking beer glass that helps maintain the head of the beer and shows off it’s clarity.
The homebrew itself should be very light gold in color and be very clear, to the point you can almost see perfectly through it. It’s head is typically between low & medium and it will not last long.
What About Mouthfeel?
It is a very smooth and refreshing beer that has a mouthfeel that is crisp and dry. Carbonation is elevated but not as high as some beers, shoot for a medium carbonation level with fast rising bubbles.
What it Should Smell Like (Aroma)
Due to the use of Pilsner malt in the brewing process you will typically catch a slight grainy aroma in most versions of this homebrew. Sometimes you might catch an aroma from the hops that are used and while that is fine when you are homebrewing if you get the chance to try a Kolsch in Cologne the hop aroma will not be present.
How Should it Taste (Flavor)
The taste could be described as being soft. There is no bitterness in this beer. It is not like a pale ale where hops are sometimes used in abundance to experiment with new flavors. A Kolsch is always supposed to taste the same between varieties. You are not going to get much to any hop flavor. It is a delicate light beer that is designed to quench your thirst on those hot summer days.
What Grains You Should Use
This is homebrewing so you do have the final say in what grains you use. Having said that if you are brewing an authentic Kolsch the majority if not all of the grain bill will be German Pilsner.
You will find that most brewers add Vienna malt to the grain bill also in order to increase the flavor from the malt. Experiment with this if you like. I have seen some brewers recommend no more than 5% Vienna while others go for a full 50/50 split between it and Pilsner.
And than of course you can add a little bit of dextrin or even wheat for a little better head retention and body. I prefer dextrin in this case, but would keep it to no more than 0.5 lb per 5 gallon batch.
What Hops You Should Use
As stated earlier this is not the beer to be experimenting with by loading it up with hops. Stay clear of your favorite citrus bomb American hops. You want to use the noble German hops such as Tettnang and Hallertau. Most Kolschs I brew have used Hallertau. One hop addition at the 60-min mark is all that is required. Shoot for around 20 – 25 IBUs.
The Best Yeast to Use
If you have followed me for any time at all you know that when it comes to yeast I am a die hard fan of the dry yeasts and my go to for most beers is usually us-05 or s-04 as well as Nottingham. However when home brewing a Kolsch you will want to use a yeast designed for this style of beer. White labs and Wyeast all have good liquid yeasts you can use however being the dry yeast fan I am I use Safale K-97 that does a great job with this style of beer.
Home Brew Kolsch Recipe
Alright the time has come to actually homebrew a Kolsch for yourself. The following recipe is a simple recipe that makes a delicious and refreshing beer.
It uses Pilsner malt as the majority of the base grain. We include a little bit of Vienna malt (approximately 10%) that provides just the right grainy or malt flavor. Carapils (dextrine) is also included (.5%) to add a slight bit of body and head retention.
For hops, we are sticking with Hallertau Tradition and the yeast is the Safale K-97.
Let’s take a look at it by the numbers…
SRM: 3.67
Target OG: 1.047
Target FG: 1.009
ABV: 5%
IBU: 30
Pre Boil Volume: 6.5 gallons
Fermenter Volume: 5.2 gallons
Brew House Efficiency: 70%
Grains
- 8 lbs Pilsner Malt
- 1 lb Vienna Malt
- .5 lb Carapils (dextrine)
Hops
- 1 oz Hallertau Tradition (60 mins)
Yeast
- Safale K-97 or any Kolsch yeast you wish.
Brewing Instructions
Mash for 60 minutes at 148 degrees Fahrenheit
Boil is for 60 minutes
Add 1oz Hallertau Tradition at start of the boil (60-min mark)
Add 1 tablet of Whirlflock (Irish Moss) with 15 – 20 mins left in the boil.
Chill the wort as quickly as you can. Transfer to the fermenter and pitch the yeast. Ferment until FG is reached. I recommend cold crashing this beer for 2 – 4 days if possible. Also consider using fining agents such as Gelatin to help clarify the beer.
You can learn more about how to use fining agents here: How to clear beer.
Here is a post on using Gelatin: Using Gelatin to clear beer.
If you have the ability to cold condition this beer than do so for at least 2-4 weeks. This can be done in either a secondary fermenter that you have purged of oxygen, a keg or bottles. You want the temperature to be just above freezing temperatures, i.e. the temperature of your fridge. The easiest and safest way to do this is to simply bottle or keg your homebrew and let it sit in your fridge or kegerator for the 2-4 weeks before drinking.
Where to Get Ingredients
You will be able to easily source these ingredients at any homebrew store.
Alternatively if you want to support this site I have put together a list of my top 5 recommended online vendors. If you purchase your ingredients from them they provide us with a referral fee at “no” extra charge to you. It’s win-win and Big Robb appreciates the support. Check them out here.
Equipment Required
This is an all grain beer so you will obviously need all grain homebrewing equipment. I personally brew on what is referred to as “all-in-one” brewing systems. I do so as they are the easiest way to make all grain beer, the equipment cost is much less, clean up is a breeze and they make as good or better beer than any system I have brewed on.
You can learn about these systems here: Electric BIAB everything you need to know.
I have also put together a post that goes over all of the other equipment you need to homebrew beer, you can check that post out here if you like: What do I need to brew a beer?
There you have it my friend, you now know exactly how to homebrew a Kolsch. If you have any questions feel free to ask me in the comment section below.
I also always enjoy hearing from you guys, so if you found this post helpful also let me know in the comments.
And now it is time for you to…
Go get your brew awwnnn.
Big Robb is out!

P.S. How would you like to have my top 5 favorite beer recipes for Free? Well you are in luck. For a limited time I am giving them away. I brewed these in my beer pub and they were big hits. On the side of the blog you can sign up to get instant access to them now. (bottom of the blog if you are on a smart device)